What Size Waders Do I Need
You are about to enter into the world of waders and have no idea how to purchase the correct size. No worries; we are here to help.
According to the U.S. Fish and Wildlife Service, over 100 million Americans take part in some version of wildlife-related recreation and over $150 billion is spent on products for these activities. With focus and capital clearly invested in this niche, the market responded with a variety of options of waders.
While an abundance of options is accommodating, it is also overwhelming. What size do you need? Are there unforeseen factors to take into account? Are you missing something? This guide is your one-stop-shop for wader sizing and more. Instead of hunting through the vast internet, our article will be your resource for waders.
Click Here for different types of waders
Determine the use to size correctly
While some waders can be multi-purposeful, many are designed for specific times of the year or conditions when you “wade in” water. Before jumping into your purchase, it is imperative to examine your purpose and expected terrain for waders.
There are two main types of waders and depending on the one you prefer to use, the bootfoot or the stocking foot wader, the sizing may be variable. According to Tim Daughton, Orvis Product Developer for waders and boots, neither bootfoot or stocking foot is better than the other, but it more comes down to what the purpose and preferences are.
Because a bootfoot, as the name implies, comes with a boot and a stocking foot, you guessed it, comes with a stocking, you need to consider which type you would like to purchase before looking into sizing.
Bootfoot waders
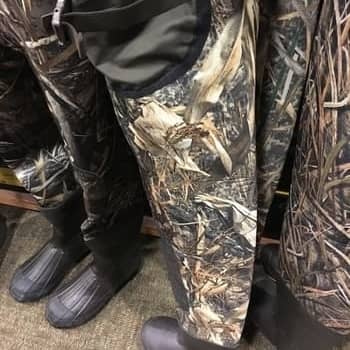
Bootfoot waders are sized by the boot size. For example, if you wear a size 10 boot, you would order a size 10 wader. Many brands have stout sizes. Stout sizes have a larger chest measurement. A cheaper bootfoot will only have sizes with no additional option (example: size 10), where your more expensive waders will have options such as tall or stout, in addition to the “size 10.” You could even have a 2X Stout or a XTall in a more expensive bootfoot wader.
When taking your sizes, measure your chest, waist and hips at their largest point, your inseam (crotch to the floor) and have your shoe size. Using flexible tape helps. Your “girth” is your largest measurement around you which is typically your chest or stomach area. Your inseam, as you are going all the way to the floor, should be longer than your typical pants inseam. Most manufacturers have sizing charts you then use to determine which size to order.
Using a size 10 shoe size, if you were purchasing an Allen Deepwoods Neoprene Bootfoot Hunting Chest Wader, you would have the option of ordering a size 10 or a size 10 King (their term for stout). The size chart lets you know that while the inseam is the same, the chest is about 4” larger in the King size. As a general rule, if you are in between sizes, go up a size. A stout can run from 2”-4” larger in the chest than a regular size.
Further, by taking a few minutes to review the product description of the bootfoot wader, you can determine the best environment for that particular wader. In the example above, Allen lists this as a wader specific for cold water fishing and hunting so if you are looking for a lighter wader for warmer weather, you will not want to even bother with the sizing of this wader.
Some avid hunters and fishers recommend going up a size if you will be wearing additional socks with your bootfoot waders, as they could cause the boot to feel too snug during your trip. If this is of concern to you, it is recommended you bring with you the clothing and socks you typically wear on a hunting/fishing trip when going to a physical store front to try on the waders.
Stocking foot waders
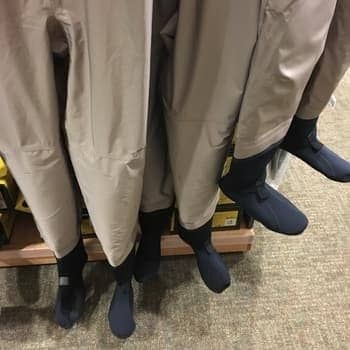
While bootfoot waders have an attached boot, stocking foot waders have an attached stocking. This stocking must then be put into a separate boot. Most will have a built-in wading cuff.
When trying to determine size, stocking foot waders have a much wider selection of sizes. If you need a small but have a wider chest, you can order a small stout or even extra stout. If you are on the taller end of a small, order a small tall. Because there are more options, you have the ability to make the waders fit the size you need.
Most smalls run about a foot size of 6-8, Mediums are 8-10 or 11 and Larges are 10 to about a 12. XL typically is 11-13 and XXL leans to 13-15. While each company may have their own sizing charts, you can use the chest and inseam measurements to determine which is best for you.
Make sure you also take your measurements in the undergarments you plan on wearing to ensure that the waders are not too tight due to expected additional clothing. If your waders are too loose, you could have baggy, slouchy garments which will result in unsmooth movements in the water. If they are too tight, it may cause the waders to wear out quicker.
Measure your chest, waist, inseam and shoe size. Most mediums tend to have a 30”- 32” inseam and are typically for 5’ 6” to 5’ 11”. Of course, companies will vary so you want to ensure that you check the charts before ordering. Because fit is so important to the longevity, you want to make sure you try these on if at all possible.
How should they feel
When you try on your waders, kneel down. Are you able to bend comfortable with maybe a little pressure? You do not want to feel as if you are going to split the seams by kneeling. Do they feel a little tight? Try loosening the shoulder straps.
Many times, people purchase waders that do not allow for a deep bend in the knee. You want to have your waders a little on the longer side so that you can bend to get out of a creek or to reach down if needed. By not allowing this deep bend, the seams can become compromised and eventually shorten the length of your waders.
Besides the potential ripped seams, waders that are too small restrict your ability to move freely and tire you out quicker. On the other hand, waders that are too large will allow potential elements to enter into your waders and make you sluggish and decrease your insulation. Taking the time to ensure the proper fit solidifies your chances of a much more enjoyable experience.
Finally, in terms of the actual boot if you are getting bootfoot waders, if the toe box of the boot is too tight, your feet will not be able to spread properly and will end up feeling crammed and cold. If you get a boot with a little more room, or wider, in the toe box, you have a better chance to allow circulation and your foot to naturally be able to move some and warm up.
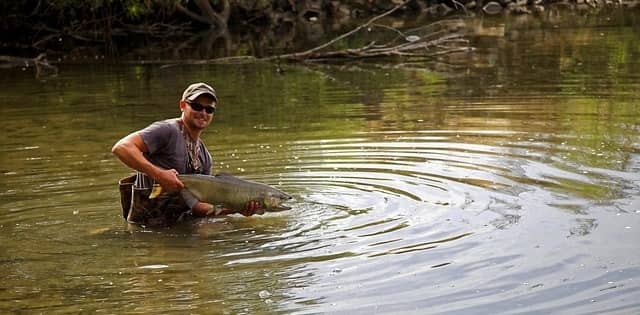
Different types of waders
After you figure out your sizing, next on the agenda is to evaluate what type of wader you want to invest in.
Depending on your intended use, the terrain, amount of times you plan to go out, weather conditions when using the waders and your budget, you may have a specific wader that will work best or on the contrary, perhaps you are finding yourself needing the most versatile kind.
Below is an overview of different types of waders. You will notice bootfoot and stocking foot are included again. This is intended to give you a deeper look into the differences between the waders.
Chest
Imagine overalls but much more expensive. Chest waders are made to go up to your chest. You can layer under these during the colder months. Although mostly used by those focused on larger fish or game, they are the most versatile type of wader. They are great for rainier days or in deep water.
A point of caution here is if you should tip, your waders could fill up with water and you will find yourself in a dangerous or drowning situation. Wear a wading belt with chest waders to help prevent your waders from filling up.
Hip
Hip waders are often thought of as the wader of the novice hunter or those that go out infrequently. These waders come to a few inches above the knee and are held in place with a belt and are not a good option if you are wanting warmth as a benefit of your waders.
Because they do not go high up on the body, a terrain with deep water would not be appropriate for these waders. Instead, streams and creeks with a shallow body of water are best.
Waist
Waist waders are the compromise between hip and chest. They come to the waist and are generally held up with a belt. Ideally the water length is no higher than thigh high. This option is ideal for the person who is going to be standing in cold water and yet wants to freedom of their top half. Many times you find these waders with individuals who are wanting to fish but mostly during the spring and summer months.
Bootfoot
Although we went into detail on bootfoot waders above, a few more points are worth mentioning. If you are a person who is fishing a lot from a beach or area with debris that could find its way into your boot, the convenience of the boot being attached to the wader may peak your interest. With no seams for small pebbles to sneak in, the bootfoot wader helps to keep your feet free from these pesky particles.
These tend to hold more body heat. Because of no break from the leg to the boot, these waders are less likely to tangle up in a fishing line. That said, they are harder to move around in (think how rain boots feel) and are not great for hiking or moving a lot in the water.
Stocking foot
The stocking foot wader is the wader of choice for many. Because the boot is separate, different boots can be customized with this wader for a variety of terrains and traction needs. Furthermore, they are lightweight so packing your wader a much easier task.
As mentioned, you will need to purchase separate boots and potentially gravel guards. You have a variety of sole options due to the ability to purchase boots based upon your need, terrain or usage.
What materials are waders made from?
To be general, there are two basic types of wader groups – breathable and non-breathable waders. Breathable waders allow the sweat and moisture to flow out of the wader but they also can be a bit more fragile. Non-breathable waders are much more durable but also trap the sweat and moisture in, which can be uncomfortable during the hotter months.
Breathable waders
Breathable waders are made of a thinner material. The material is coated with DWR (Durable Water Repellant) to make them waterproof yet breathable. This is then layered to create a waterproof membrane. Simms uses Gore-Tex but other companies will use their own material.
When imagining breathable waders, think of how a rain jacket would feel. Because they are lightweight, they make a great option for keeping cooler in the summer months. They are a crowd favorite but also come with the a more expensive cost.
This type of wader is easier to pull on than neoprene waders. Because they are breathable, they also have the advantage of not causing you to overheat and assist in wicking the sweat from your body to the outside of the wader. You can layer up in colder months and even have an option of a custom liner that can be taken out for the warmer months.
Non-breathable waders
Neoprene
Neoprene is a common non-breathable wader. It is a tough material and will tend to have a long life. They are easy to clean and can be dyed to blend in with the environment. Because they are stretchable, they have a large range of sizes. Being that the waders are both heavy and bulky, they aren’t great for packing for a long hike.
This material is similar to wetsuit material and is great at keeping a person insulated and dry. For icy, frigid waters or cold or below freezing environments, this is the type of wader that would be preferred. Because this is a less giving material, a person wearing these would tend to be less active.
Most neoprene waders come in sizes of 3.5mm or 5mm. Most people find the 3.5mm is plenty warm for their usage. Because these are not breathable, you can expect you will probably sweat and then the sweat will stay in the waders during the trip.
Rubber
These waders fall into the one size fits all category. While they are cheaper, they tend to run size as a single option. For example, if you are ordering a medium, your shoe is medium, your body is medium and that is it. These would not be the option for short or tall wearers.
Rubber is obviously waterproof and incredibly durable. Most waist or chest high waders that use rubber combine it with other materials. Wearing these waders, you are ensured to sweat a lot; however, they are not known for keeping heat in.
As for repairing the waders, rubber waders are very easy to repair and when they are beyond repair, due to their inexpensive nature, you can replace them easily. These waders are perfect for individuals not in need of using waders frequently, especially given their heavy nature.
PVC waders
PVC waders are the new rubber. While still inexpensive, they are as light as breathable waders. Because they are so light, they are able to be packed into a bag and transported much easier than their rubber counterparts. There is not much boot insulation so doubling up on socks may be necessary, although this may also cause foot sweat and then trapped moisture. These waders are quick to get on and off.
Canvas waders
While heavier than PVC and rubber, but not as heavy as Neoprene, Canvas waders perform better than the other non-breathable waders in terms of durability. The nice thing with canvas waders is if you snag here or there, you are much less likely to actually puncture the wader. They are warmer than PVC and rubber but not as warm as the neoprene waders. These waders are looser than the other kinds, allowing a little bit of air flow and gives you the space to layer in the colder months. You will find yourself spending a bit more on canvas waders than on its rubber counterparts. These waders are often used for duck hunting.
What to wear under waders
A word to the new – cotton is not an awesome material for layering. Although it may seem natural to put on a t-shirt or cotton socks, cotton actually will hold the water in and work against you. Silk is not a great alternative, either. Really the only natural material to help with the cold is wool. When you are cold, you lose the ability to have your muscles respond appropriately, so it makes a big difference in what you layer with. Below are more specifics on what to wear and when.
What to wear under waders in winter
In the winter, you want to remain dry and warm enough that you are comfortable and not sweating. This particular skill may take some practice to learn the best layering techniques.
Starting from the bottom up, you will want to layer your socks. Keep in mind if you have selected a bootfoot wader, you may want to ensure that you went up a size when purchasing your wader or you at least brought your socks with you when you tried on your wader. When layering socks, your first pair should be made of a synthetic material. A quick google search of “cool max liner socks” will turn up options if you are unsure where to go. Your next layer is a midweight wool or nylon sock. Again, make sure you then try these on with your wader or your boots to ensure that you still maintain proper circulation with the layers.
As we move to the legs and torso, again, you want to start with a synthetic material or a wool/synthetic blend. This helps to pull the moisture away but still provide warmth. Following this layer, add fleece and more fleece.
Keep in mind that your legs and feet are what will be submerged in water. Double or triple layering is totally appropriate if it proves to keep you warm and dry. Be sure to click here for an in-depth article about outdoor socks.
What to wear under waders in summer
Just like winter months, your summer months require you to think about your feet as well. You want to have a synthetic, lightweight sock that you can use for the summer months. Especially with higher temperatures, it is important that your feet stay dry and not a sweaty mess in your boots. If you are using a stocking foot wader, you may want a smaller set of boots for the summer.
A lightweight, synthetic shirt and pants will provide a place for sweat to go. While jeans may seem like a natural fit, remember that jeans are cotton and unless you prefer to feel as if you are sitting in a wet towel, you will want to forgo the ease and take the few extra minutes to put on a synthetic blend of undergarments.
How to dry waders
After investing so much time in researching the proper waders and then dishing out hard earned money on a pair, it would be a pity to turn around and shorten their lifespan by simply not taking the time to dry them correctly.
By taking a few extra steps after use, you will get the most out of your purchase. Below are a few quick tips on how to properly store and dry your waders.
How to store waders
When you are storing your waders, either hang them up or lay them flat. You want them to stay out of the sunlight. Ultraviolet light will break down the DWR quicker. Make sure your location of storage is cool and dry.
If you are planning on not using your waders for a long period of time (example, over winter), instead of hanging your waders, ensure they are completely dry and then loosely roll up the waders. Do not store in an air tight container.
How to dry waders
After spending a day having sweat make friends with your body or allowing the waders to pull it off you and out, it is necessary to then dry that moisture up. Allow your waders to hang upside down and inside out. Make sure they are out of the sunlight when drying. Do not put them on a radiator.
No one wants mildew in their waders. Aside from the gross factor, they break down the material your waders are made of, diminishing the life. Take the time to properly dry your waders.
Never use a typical dryer and tumble dry your waders. You will want to air dry them or purchase a wader dryer.
Now that you know how to size your waders, the types of waders and the differences in materials, as well as what to wear under them and how to dry them, it is time for you to evaluate when and where you are going to wade in the water and try out your new pair. With your waders on and the elements no longer being as much of a distraction, you can live the words of Ralph Waldo Emerson, “do not go where the path may lead, go instead where there is no path and leave a trail.”
